Graveyard Pudding Cookie Cups Recipe
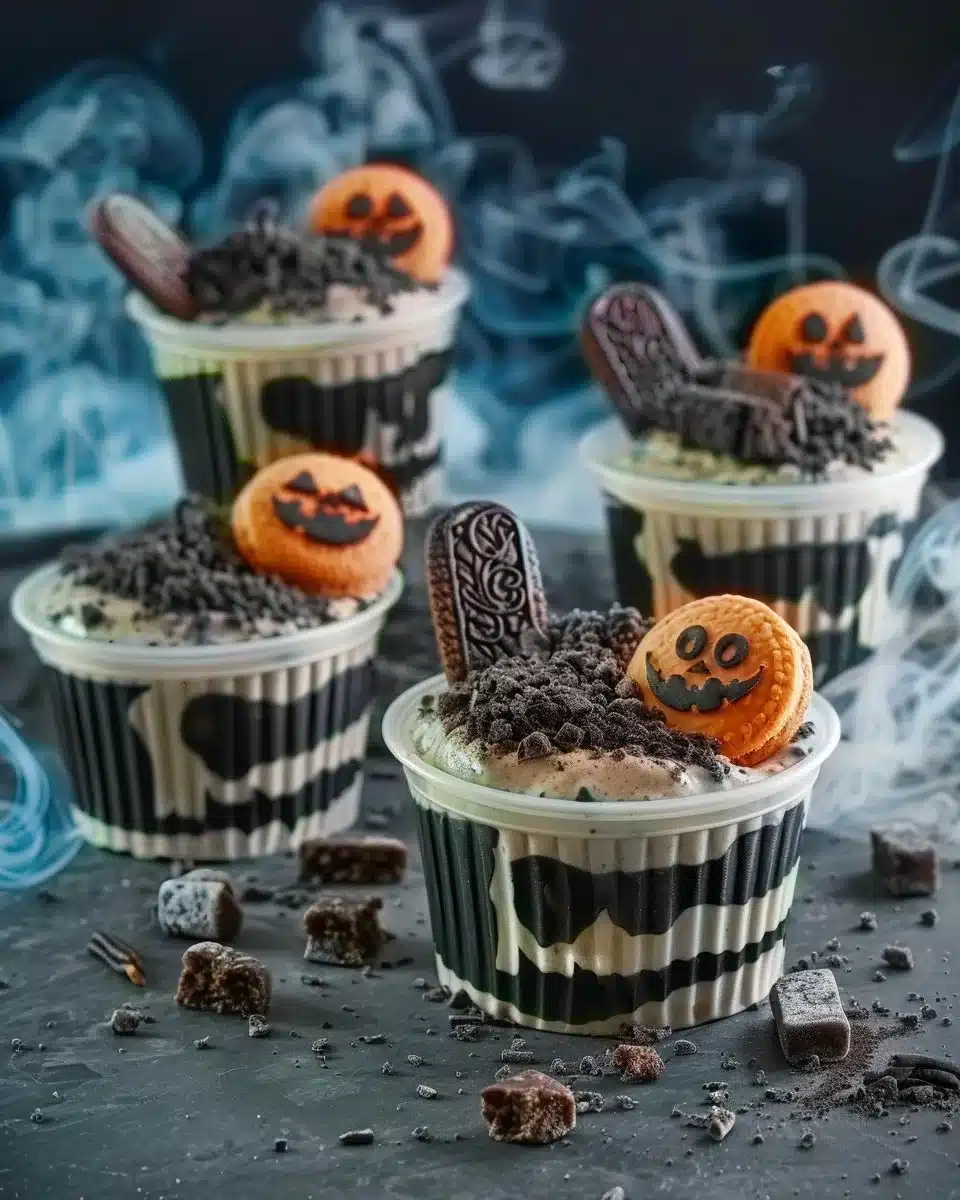
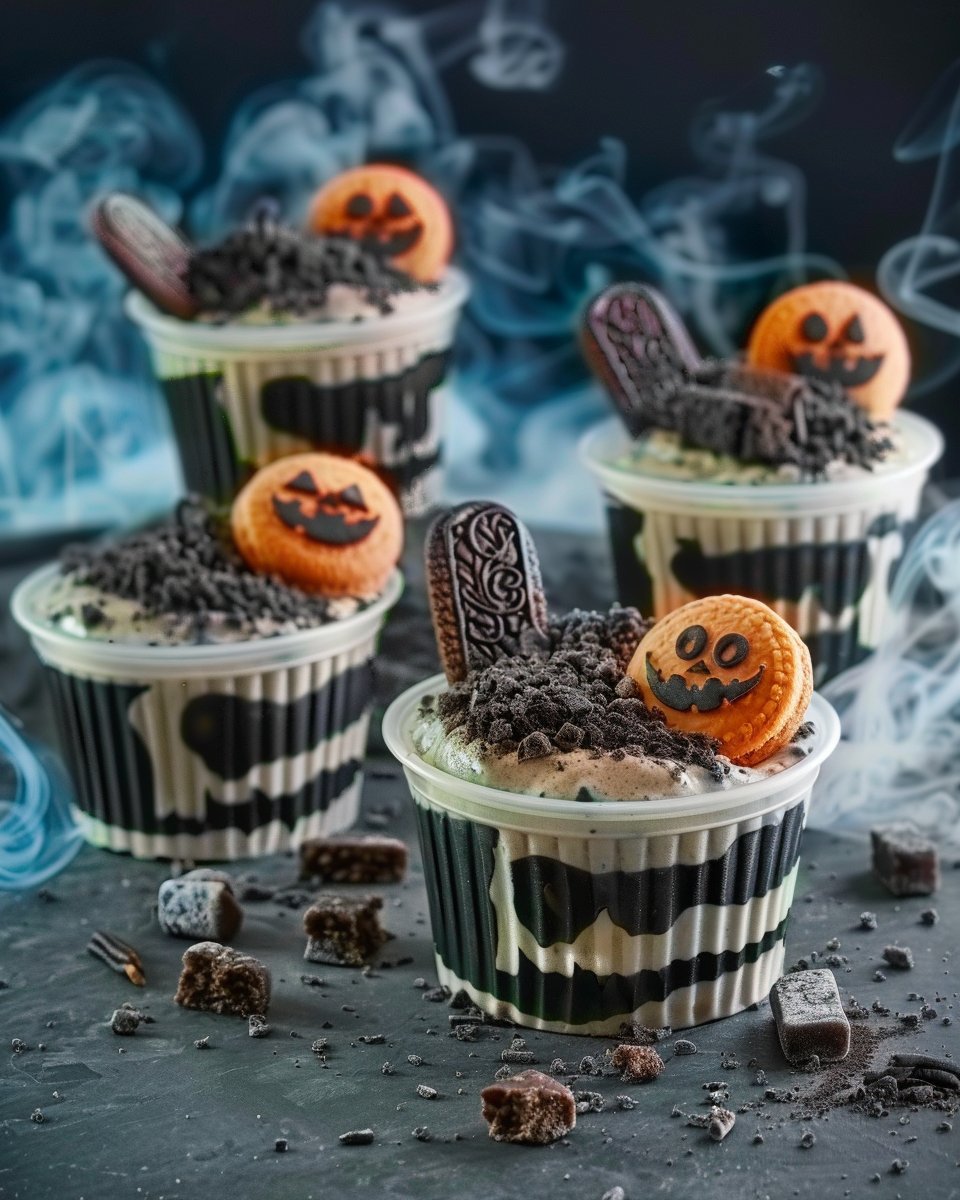
Get ready to indulge in a fun and spooky treat with these Graveyard Pudding Cookie Cups. Perfect for Halloween gatherings, these delightful desserts offer a creamy pudding layered with crunchy cookie crumbs and decorated to look like a graveyard scene. Not only are they visually captivating, but they are also incredibly easy to make, ensuring that you can whip them up in no time. Let’s explore why you should make this festive dessert! You may also find Apricot Pillow Cookies 2 useful.
Why Make This Recipe
Graveyard Pudding Cookie Cups stand out as a playful, delicious option for Halloween parties or any themed event. They provide a great opportunity for kids and adults alike to engage in some culinary creativity. Plus, who doesn’t love a dessert that combines the smoothness of pudding with the crunch of cookies? If you’re looking for more inventive cookie ideas, check out Apricot Filled Thumbprint Cookies as another creative treat!
How to Make Graveyard Pudding Cookie Cups
Ingredients:
- 5.1 oz Chocolate Instant Pudding Mix
- 3 Cups Milk
- 8 oz Cool Whip
- 24 Oreo Cookies
- 6 Milano Double Chocolate Cookies
- Black Frosting or Black Edible Marker
- 6 Candy Pumpkins
- Googley Eyes
- Gummy Worms
Directions:
- With black frosting (using a small frosting tip) or with an edible marker, write “RIP” on each of the Milano cookies to create a tombstone. Set aside.
- In a stand mixer, whisk together the pudding mix and milk on medium speed for about 2 minutes.
- Gently fold in the Cool Whip until well blended.
- Crush the Oreo cookies into fine crumbs using a food processor.
- Sprinkle 3-4 tablespoons of the crumbs into the bottom of six clear 9 oz. plastic cups.
- Press a few googley eyes around the edges between the crumbs and the cup so they appear to be peeking out.
- Spoon an even layer of the pudding mixture on top of the cookie crumbs.
- Repeat the last three steps once more for a second layer.
- Finish by sprinkling additional cookie crumbs on top until they almost reach the lip of the cup.
- Firmly insert one cookie tombstone into the center of each pudding cup.
- Gently press a candy pumpkin beside each tombstone.
- If desired, embellish further with gummy worms.

Pro Tips for Success with Graveyard Pudding Cookie Cups:
- Use Fresh Ingredients: Make sure that your pudding mix and Cool Whip are fresh for the best texture and flavor.
- Customize Your Decorations: While the classic graveyard look is fun, feel free to change up the decorations with other candy or sprinkles that fit your theme!
- Make Ahead: These cups can be made a day ahead and stored in the refrigerator until you’re ready to serve. Just add the toppings right before presenting for the best look.
- Layer Creatively: You can add more layers or use different flavors of pudding to elevate the visuals and taste.
- Get the Kids Involved: Decorating the cups can be a fun activity for kids, allowing them to personalize their own spooky creations.
Flavor Variations for Graveyard Pudding Cookie Cups
- Vanilla Pudding: Swap the chocolate pudding for vanilla for a different flavor that pairs nicely with the cookies.
- Mix Different Cookies: Use a combination of Oreos and other types of cookies to enhance texture and flavor complexity.
- Add Fruit: Incorporate some crushed fruit, like strawberries or raspberries, in the layers for a fruity twist.
- Different Toppings: Try adding crunchy candy like crushed pretzels or nuts for added crunch and flavor surprise.
Serving Suggestions for Graveyard Pudding Cookie Cups
These pudding cups can be presented on a spooky-themed table during Halloween parties or special gatherings. Use a black or orange tablecloth to enhance the theme! Consider accompanying them with other Halloween treats like ghost-shaped marshmallows or witch hat cookies. For more creative cookie ideas, check out Almond Joy Inspired Cookies that are just as festive!
Storage and Freezing Instructions for Graveyard Pudding Cookie Cups
If you have leftovers, you can cover the pudding cups with plastic wrap and store them in the refrigerator for up to three days. However, these treats are best enjoyed fresh, so try to consume them within that time. Freezing these cups is not recommended, as the texture of the pudding and Cool Whip may change once thawed.
Nutrition Facts (Per Serving)
- Calories: 300
- Protein: 4g
- Carbohydrates: 40g
- Fat: 15g
- Fiber: 2g
- Sodium: 250mg
FAQ About Graveyard Pudding Cookie Cups
Can I use different types of cookies?
Absolutely! While Oreos and Milano cookies create the classic graveyard effect, you can experiment with various cookies that you enjoy. Just keep in mind that the flavors should complement each other for the best taste.
How long can I prepare these cups ahead of time?
You can make the pudding cups a day in advance. Just make sure to store them in the refrigerator and add any toppings like the gummy worms or decorative cookies right before serving.
Are there any alternatives for the pudding?
Yes, you can use different flavors of pudding to match your theme or preference. Vanilla or butterscotch puddings could also provide delicious alternatives that pair wonderfully with the cookies.
What other decorations can I use?
Get creative! In addition to gummy worms and candy pumpkins, you can incorporate chocolate sprinkles, crushed candy bars, or edible glitter for an extra festive touch.
Can I make these without Cool Whip?
Certainly! If you prefer to avoid using Cool Whip, you can substitute it with homemade whipped cream. Just ensure it’s gently folded in to keep the lightness of the pudding.
Final Thoughts
Graveyard Pudding Cookie Cups are a fantastic and whimsical dessert that will bring joy to any Halloween celebration. With their easy preparation and fun presentation, they are sure to be a hit among guests of all ages. Whether for a spooky gathering or a family treat, these cups are a delightful way to embrace the spirit of Halloween. Enjoy creating your sweet graveyard scene!
Print
Graveyard Pudding Cookie Cups
- Total Time: 15 minutes
- Yield: 6 servings
- Diet: Vegetarian
Description
Delightful Halloween-themed dessert cups filled with creamy pudding and cookie crumbs, decorated to resemble a spooky graveyard.
Ingredients
- 5.1 oz Chocolate Instant Pudding Mix
- 3 Cups Milk
- 8 oz Cool Whip
- 24 Oreo Cookies
- 6 Milano Double Chocolate Cookies
- Black Frosting or Black Edible Marker
- 6 Candy Pumpkins
- Googley Eyes
- Gummy Worms
Instructions
- Write ‘RIP’ on each of the Milano cookies using black frosting or an edible marker to create tombstones. Set aside.
- Whisk together the pudding mix and milk in a stand mixer on medium speed for about 2 minutes.
- Fold in the Cool Whip until well blended.
- Crush the Oreo cookies into fine crumbs using a food processor.
- Sprinkle 3-4 tablespoons of the crumbs into the bottom of six clear 9 oz. plastic cups.
- Press a few googly eyes around the edges between the crumbs and the cup.
- Spoon an even layer of the pudding mixture on top of the cookie crumbs.
- Repeat the crumbs and pudding layering for a second layer.
- Finish by sprinkling additional cookie crumbs on top.
- Insert one cookie tombstone into the center of each pudding cup.
- Press a candy pumpkin beside each tombstone.
- Embellish with gummy worms if desired.
Notes
Serve immediately or refrigerate for up to three days. Add toppings just before serving for the best presentation.
- Prep Time: 15 minutes
- Cook Time: 0 minutes
- Category: Dessert
- Method: No-Bake
- Cuisine: American