Mummy Halloween Brownies
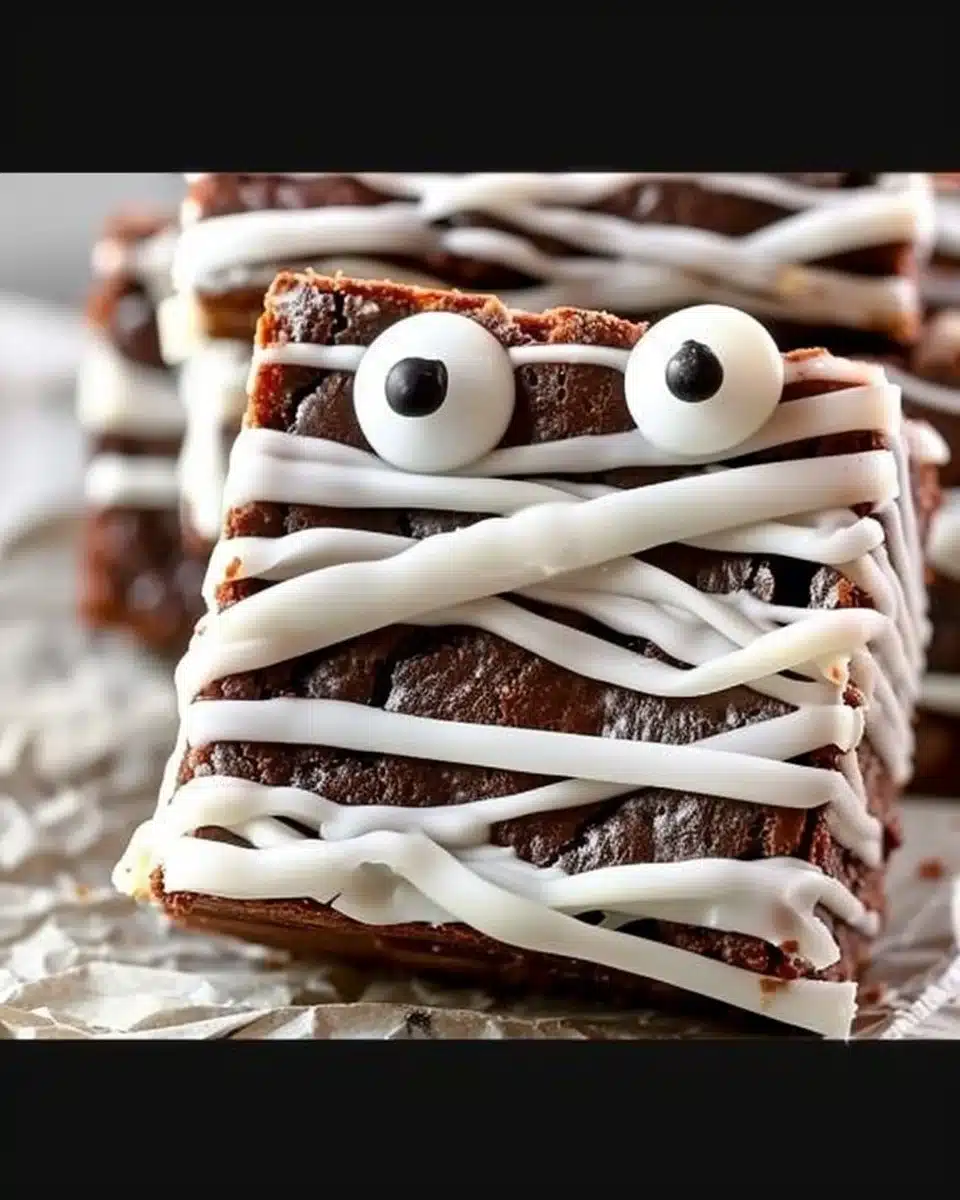
Mummy Halloween brownies are a fun and spooky treat that’s perfect for your Halloween festivities. They combine a rich chocolate brownie base with a playful decoration that kids and adults alike will enjoy. Whether you’re hosting a Halloween party or just want a festive dessert to enjoy, these brownies will surely satisfy your sweet tooth! You may also find Baileys Buttercream Brownies useful.
Why Make This Recipe
Making Mummy Halloween brownies is not only delightful, but it also involves a fun decorating process that can engage the whole family. This recipe allows you to unleash your creativity while enjoying delicious chocolatey goodness. Plus, they can be made quickly, making them an easy dessert option for busy schedules. If you’re a fan of brownies, you might also want to check out some other delicious brownie variations like banana chocolate chip brownies.
How to Make Mummy Halloween Brownies
Creating these spooky treats is straightforward and requires just a few ingredients. Let’s dive into the specifics. You may also find Banana Pudding Brownies useful.
Ingredients
Before we get started with the directions, here’s what you’ll need:
- 8 tbsp unsalted butter
- 3/4 cup granulated sugar
- 1/2 cup light or dark brown sugar
- 2 large eggs
- 8 oz (about 1 cup) chocolate chips (you can also use a chocolate block)
- 1 tsp vanilla extract
- 3/4 cup all-purpose flour
- 1/4 cup unsweetened cocoa powder
- 1/2 tsp salt
- ½ cup white frosting
- 24 candy eyeballs
Directions
- Preheat your oven to 350 degrees Fahrenheit.
- In a bowl, combine 8 tbsp melted butter with 3/4 cup granulated sugar and 1/2 cup brown sugar. Use an electric hand mixer to blend them well.
- Add 2 large eggs and 1 tsp vanilla extract to the mixture and mix to combine.
- In a separate microwave-safe bowl, place 8 oz (about 1 cup) of chocolate chips. Microwave in 20-second increments, mixing in between. Continue until fully melted, usually taking about 3-4 rounds in total.
- Pour the melted chocolate into the butter-sugar combination and mix well using a rubber spatula.
- Sift in 3/4 cup all-purpose flour, 1/4 cup cocoa powder, and 1/2 tsp salt. Stir until combined, being careful not to overmix.
- Grease an 8×8 glass pan with nonstick spray. Pour the brownie batter into the pan and spread it evenly.
- Bake for about 45 minutes, depending on your desired doneness. The brownies are ready when a toothpick inserted in the center comes out clean. For fudgier brownies, you can remove them from the oven when the toothpick has just a teeny amount of batter.
- Allow the brownies to cool completely. Once cooled, remove them from the pan.
- Using a knife, trim the edges of the brownies to create neat squares. Cut the brownies into 12 identical pieces, making them slightly longer than they are wide.
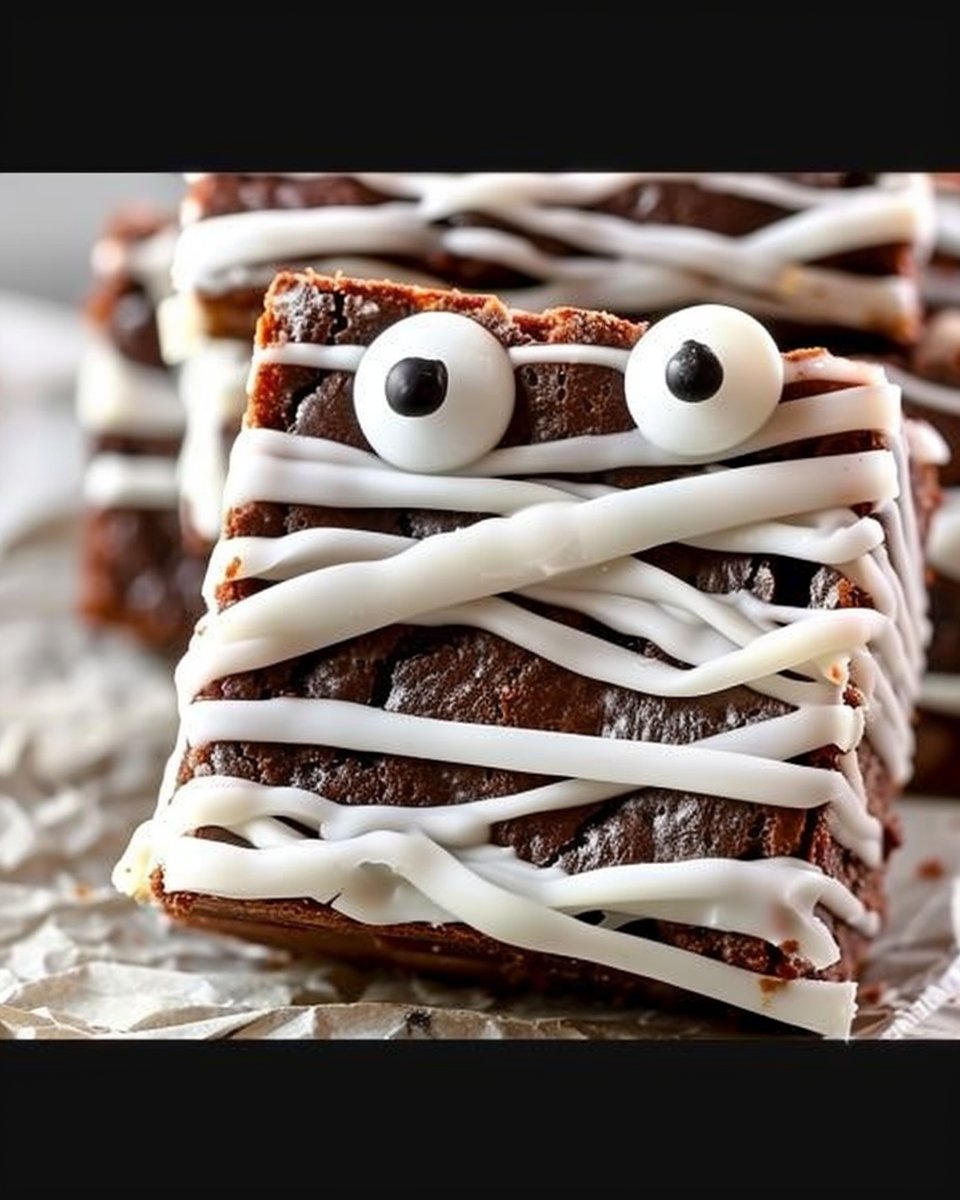
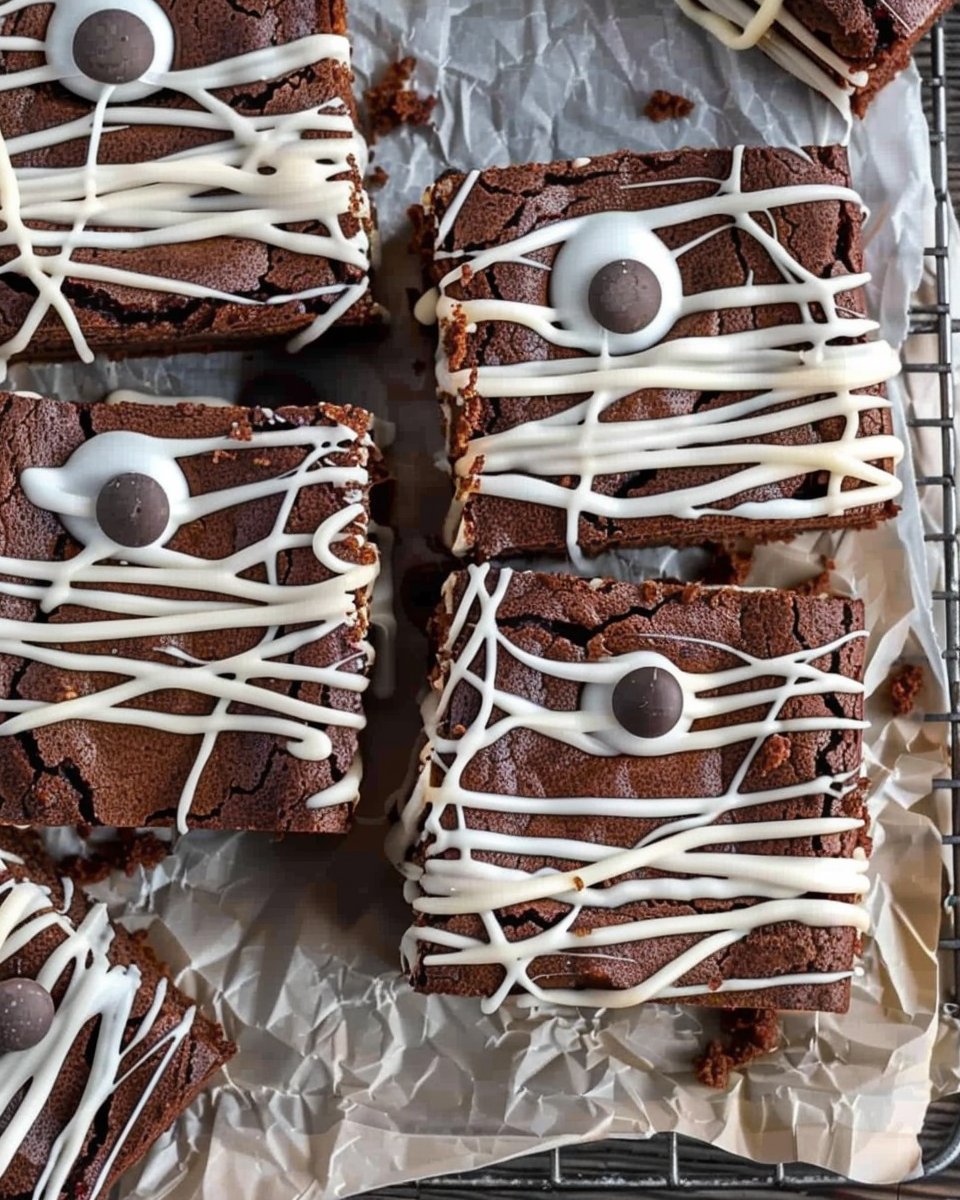
- To create the mummy design, place 1/2 cup of white frosting in a plastic bag. Snip off a tiny corner of the bag to create a piping tool.
- Pipe the frosting back and forth across each brownie randomly to create a mummy wrapping effect. Finally, place a candy eyeball about ¼ of the way down from the top of the brownie. Enjoy your spooky treats!
Pro Tips for Success with Mummy Halloween Brownies
- Make sure your butter is melted but not too hot, as this can cook the eggs when mixed.
- For an even richer chocolate flavor, consider opting for darker chocolate chips or adding a teaspoon of instant coffee to amplify the chocolate taste.
- When piping the frosting, working quickly will help create a more whimsical mummy look.
- If you want more fun designs, try using different colors of frosting for extra creativity.
- It’s essential to let the brownies cool thoroughly before cutting to avoid crumbly edges and ensure clean cuts.
Flavor Variations for Mummy Halloween Brownies
- Choco-Mint Mummies: Add a few drops of peppermint extract to your batter for a minty twist.
- Nutty Delight: Mix in chopped nuts of your choice to the brownie batter for added texture.
- White Chocolate Swirl: Before baking, swirl in melted white chocolate into your batter for a marbled effect.
- Caramel Drizzle: Drizzle caramel sauce over the finished brownies for an exciting flavor contrast.
- Fruity Surprise: Incorporate mashed bananas or applesauce into the batter to make them moist and add a hint of fruitiness.
Serving Suggestions for Mummy Halloween Brownies
These Mummy Halloween brownies can be served as a standalone dessert or paired with a scoop of vanilla ice cream for a delightful combination. For a themed table setting, serve them alongside other spooky treats like pumpkin-shaped cookies or ghostly cupcakes. They also make excellent treats to bring to classroom parties or neighborhood gatherings, enticing both kids and adults with their charming design and rich flavor.
Storage and Freezing Instructions
To store your Mummy Halloween brownies, place them in an airtight container at room temperature for up to 3 days. For longer storage, you can freeze them. Just make sure they are wrapped tightly in plastic wrap and placed in an airtight container. They can be frozen for up to 3 months. When you’re ready to enjoy them, simply thaw them at room temperature for a few hours.
Nutrition Facts (Per Serving)
- Calories: 180
- Protein: 2g
- Carbohydrates: 24g
- Fat: 9g
- Fiber: 1g
- Sodium: 95mg
FAQ About Mummy Halloween Brownies
Can I use a different type of frosting?
Absolutely! While white frosting creates a classic mummy look, you can experiment with chocolate or colored frosting to match your theme. Just make sure the frosting is a consistency that can be piped out easily.
What if I don’t have chocolate chips?
If you don’t have chocolate chips on hand, you can chop up a chocolate bar and substitute it for chips. Just ensure it’s a good-quality chocolate for the best flavor.
Can I make these brownies in advance?
Yes, these brownies can be made a day or two in advance. Just ensure they are stored properly to maintain their moisture. Decorate them with frosting and candy eyeballs the day you serve for the best presentation.
What can I do if my brownies turned out dry?
If your brownies are a bit dry, try serving them with a scoop of ice cream or whipped cream to add moisture and enhance the overall experience. If making again, reduce the baking time slightly to ensure a fudgier texture.
How can I make gluten-free Mummy Halloween brownies?
To make gluten-free brownies, simply substitute all-purpose flour with a 1:1 gluten-free baking blend. Ensure that the chocolate chips are also gluten-free to comply with dietary restrictions.
Final Thoughts
Making Mummy Halloween brownies is a delightful way to celebrate the spooky season while satisfying your sweet cravings. With their rich chocolate flavor and playful design, these treats are sure to be a hit at any gathering. Get creative and have fun decorating your brownies, and don’t forget to try out some flavor variations to keep things exciting!
Print
Mummy Halloween Brownies
- Total Time: 60 minutes
- Yield: 12 servings
- Diet: Vegetarian
Description
Spooky and fun Mummy Halloween brownies perfect for Halloween parties and celebrations.
Ingredients
- 8 tbsp unsalted butter
- 3/4 cup granulated sugar
- 1/2 cup light or dark brown sugar
- 2 large eggs
- 8 oz (about 1 cup) chocolate chips
- 1 tsp vanilla extract
- 3/4 cup all-purpose flour
- 1/4 cup unsweetened cocoa powder
- 1/2 tsp salt
- 1/2 cup white frosting
- 24 candy eyeballs
Instructions
- Preheat your oven to 350 degrees Fahrenheit.
- Combine 8 tbsp melted butter with 3/4 cup granulated sugar and 1/2 cup brown sugar in a bowl. Use an electric hand mixer to blend them well.
- Add 2 large eggs and 1 tsp vanilla extract to the mixture and mix to combine.
- Place 8 oz (about 1 cup) of chocolate chips in a separate microwave-safe bowl. Microwave in 20-second increments, mixing in between until fully melted.
- Pour the melted chocolate into the butter-sugar combination and mix well using a rubber spatula.
- Sift in 3/4 cup all-purpose flour, 1/4 cup cocoa powder, and 1/2 tsp salt. Stir until combined.
- Grease an 8×8 glass pan with nonstick spray. Pour the brownie batter into the pan and spread it evenly.
- Bake for about 45 minutes, or until a toothpick inserted in the center comes out clean.
- Allow the brownies to cool completely before removing them from the pan.
- Trim the edges and cut the brownies into 12 identical pieces.
- Pipe the frosting back and forth on each brownie to create a mummy wrapping effect. Place a candy eyeball on each brownie.
Notes
Make sure your butter is melted but not too hot. Let the brownies cool thoroughly for clean cuts.
- Prep Time: 15 minutes
- Cook Time: 45 minutes
- Category: Dessert
- Method: Baking
- Cuisine: American