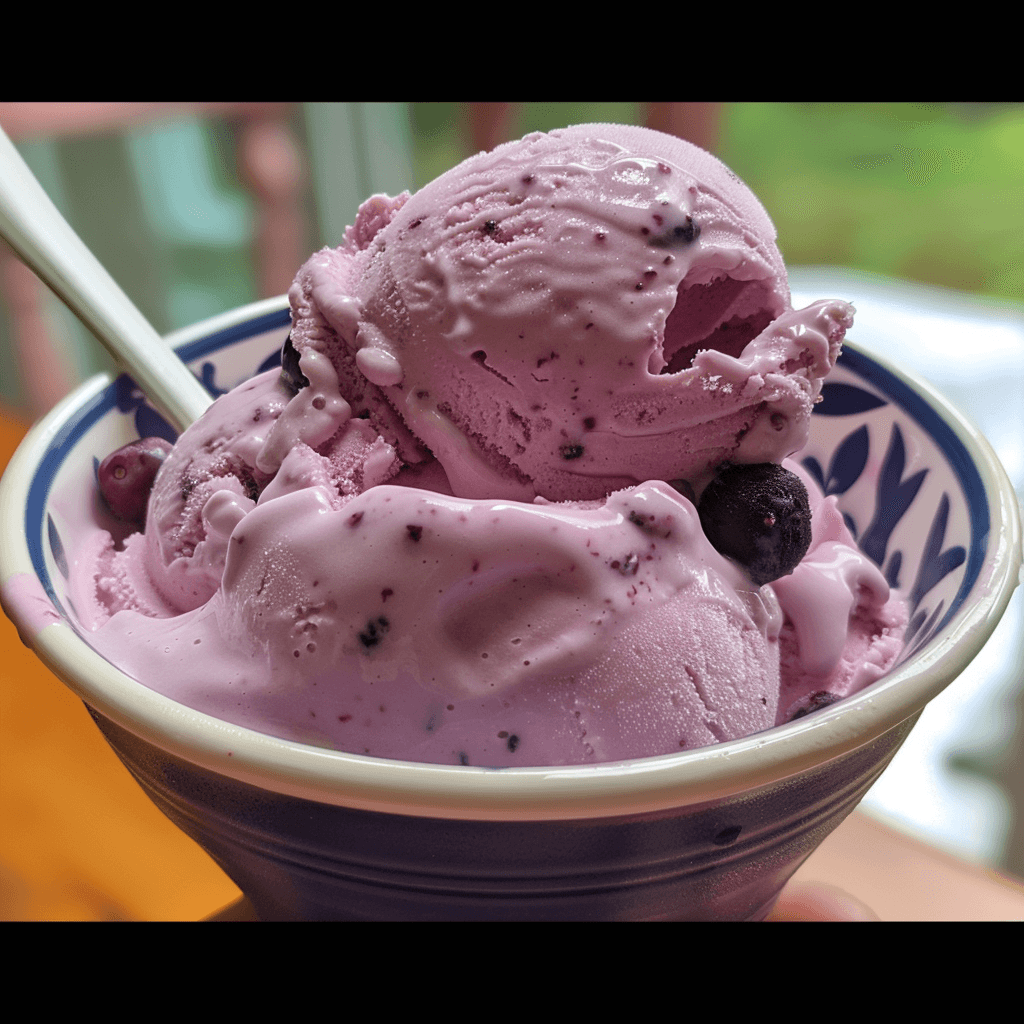
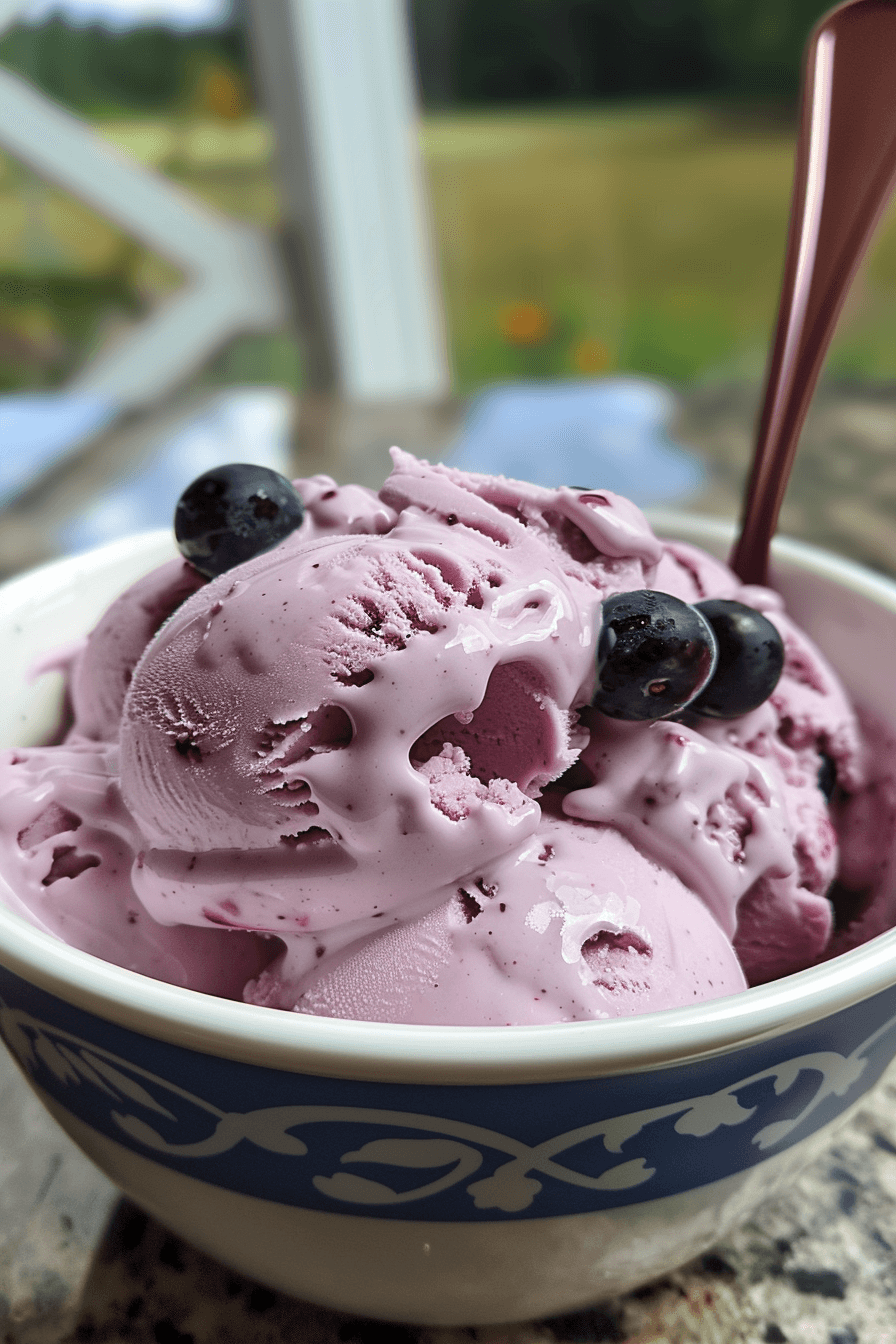
This homemade huckleberry ice cream recipe delivers a luscious, vibrant, and fruit-forward frozen treat. Using just five simple ingredients, you achieve a rich and creamy texture bursting with the distinctive tart-sweetness of fresh huckleberries. It’s an uncomplicated method for creating artisanal ice cream at home.
Homemade Huckleberry Ice Cream Recipe Overview
| Prep Time | Cook Time | Total Time | Servings | Difficulty | Cuisine |
|---|---|---|---|---|---|
| 20 minutes (+ chilling time) | 10 minutes | 30 minutes (+ chilling & churning time) | 6-8 | Easy | American |
Why This Recipe Works
My journey with homemade ice cream began years ago, seeking a way to capture the fleeting flavors of summer fruits. The pure joy of biting into a scoop of ice cream made with ingredients I knew and trusted was transformative. This particular huckleberry ice cream recipe stands out because it embraces simplicity without sacrificing flavor or texture.
The magic lies in the minimal ingredient list and the technique of gently heating the berries. This process softens them, releasing their beautiful purple juice and inherent sweetness, creating a perfectly blended base for the ice cream. The resulting swirls of vibrant berry goodness within the creamy, vanilla-infused ice cream are simply beautiful and delicious.
Ingredients
| Ingredient | Quantity | Notes & Alternatives |
|---|---|---|
| Fresh or Frozen Huckleberries | 2 cups | If using frozen, do not thaw completely before use. Wild blueberries or raspberries can be substituted if huckleberries are unavailable. |
| Granulated Sugar | 3/4 cup | Adjust to your sweetness preference and the tartness of your berries. Maple syrup or agave nectar can be used for a different flavor profile. |
| Water | 2 tablespoons | Used to help the berries break down and release juices. |
| Whole Milk | 1 cup | Using whole milk contributes to a richer mouthfeel. 2% milk can be used, but the texture will be slightly less creamy. |
| Heavy Cream | 2 cups | Essential for achieving that characteristic creamy ice cream texture. No direct substitution provides the same richness. |
| Vanilla Extract | 1 teaspoon | Enhances all the flavors, especially the berries. A vanilla bean can be scraped and added to the milk/cream mixture for a more intense flavor. |
Step-by-Step Instructions
Phase 1: Preparing the Huckleberry Base
- Place the huckleberries, granulated sugar, and water into a small saucepan.
- Heat this mixture gently over medium-low heat.
- Stir occasionally until the berries begin to soften and release their juices, and the sugar has completely dissolved. This should take about 5-7 minutes.
- Remove the saucepan from the heat.
- Divide the warm berry mixture evenly between two 1-quart freezer jars.
- Allow the berry mixture to cool slightly, then place the jars in the refrigerator to chill thoroughly, ideally for at least 2-3 hours or overnight.
Phase 2: Creating the Ice Cream Base
- In a separate large bowl or measuring cup, combine the whole milk, heavy cream, and vanilla extract.
- Stir the milk, cream, and vanilla mixture until well combined.
Phase 3: Combining and Churning
- Once the berry mixture is thoroughly chilled, pour the milk and cream mixture evenly into the jars with the chilled berries.
- Seal the jars and mix very well to distribute the berry puree throughout the dairy base. Alternatively, you can pour both mixtures into a blender and pulse briefly.
- Ensure your ice cream maker’s bowl is fully frozen according to the manufacturer’s instructions.
- Pour the combined huckleberry ice cream base into your ice cream maker.
- Churn the mixture according to the ice cream maker’s directions until it reaches a soft-serve consistency. This typically takes between 20-30 minutes.
Phase 4: Freezing and Serving
- Transfer the churned ice cream to an airtight freezer-safe container.
- For a firmer consistency, freeze for at least 2-4 hours before serving.
- Enjoy your homemade huckleberry ice cream!
Chef Tips for Perfect Results
- Chill Everything: Ensure your ice cream maker’s bowl is completely frozen and your base mixture is well-chilled before churning. This promotes faster freezing and a smoother texture.
- Don’t Overfill: Avoid filling your ice cream maker more than two-thirds full, as the mixture will expand as it churns and freezes.
- Gentle Heating is Key: When preparing the huckleberries, avoid boiling them vigorously. Gentle heating ensures the berries break down without becoming mushy and preserves their vibrant flavor.
- Berry Quality Matters: Use ripe, flavorful huckleberries for the best taste. If using frozen, select berries that haven’t been subjected to prolonged deep freezes which can affect texture.
- Adjust Sweetness: Taste your huckleberry base before churning. Adjust sugar based on the natural sweetness of the berries and your personal preference.
Common Mistakes to Avoid
- Insufficient Chilling: Why: An unfrozen ice cream maker bowl or a warm base mixture will result in icy ice cream. How to Fix: Always ensure the bowl is frozen solid for the recommended time (usually 12-24 hours) and that the base is chilled for at least 4 hours, preferably overnight.
- Over-churning: Why: Churning for too long can incorporate too much air or cause the ice cream to become too warm and melt before it’s transferred to the freezer. How to Fix: Stop churning when the ice cream reaches a thick, soft-serve consistency. It will firm up considerably during the final freezing stage.
- Using Low-Fat Dairy: Why: Fat is crucial for ice cream’s smooth and creamy texture. Lower fat content leads to a harder, icier product. How to Fix: Stick to whole milk and heavy cream for the richest, creamiest results.
- Not Chilling Huckleberry Base Enough: Why: Warm berry mixture will dilute the coldness of the ice cream base and hinder the freezing process, leading to a less smooth texture. How to Fix: Allow the huckleberry mixture to cool completely and chill thoroughly in the refrigerator before combining with dairy.
Variations and Substitutions
| Ingredient | Substitution | Impact on Flavor |
|---|---|---|
| Huckleberries | Raspberries, Blackberries, Blueberries | Will change the distinct huckleberry flavor to that of the substituted berry. Tartness levels may vary. |
| Granulated Sugar | Maple Syrup, Honey, Agave Nectar | Adds a distinct caramelized or floral note to the ice cream, deepening the sweet flavor profile. Consistency may also be slightly affected. |
| Vanilla Extract | Almond Extract, Lemon Zest | Almond extract adds a nutty background note. Lemon zest brightens the berry flavor and adds a citrusy aroma. Use sparingly. |
| Whole Milk | Evaporated Milk | Evaporated milk has a slightly richer, cooked flavor and can contribute to a denser texture. It is already partially concentrated. |
Serving Suggestions and Pairings
This homemade huckleberry ice cream is wonderfully versatile. Serve scoops in classic waffle cones or chilled dessert bowls. It’s a perfect standalone dessert for summer barbecues, family gatherings, or a special treat after a hike. Complement the tart-sweetness with a slice of warm, homemade vanilla pound cake or a simple blueberry crumble. For a refreshing contrast, pair it with a light angel food cake.
Storage and Reheating
| Method | Duration | Instructions |
|---|---|---|
| Freezer Storage | 1-2 weeks | Transfer churned ice cream to an airtight, freezer-safe container. Press parchment paper directly onto the surface to minimize ice crystal formation before sealing. Homemade ice cream is best enjoyed fresh for optimal texture. |
Nutritional Information
Approximate values per serving (assuming 8 servings):
| Nutrient | Amount per Serving |
|---|---|
| Calories | 350-400 kcal |
| Protein | 4-6g |
| Fat | 22-28g |
| Carbohydrates | 35-45g |
| Fiber | 1-2g |
| Sugar | 30-40g |
| Sodium | 30-50mg |
Frequently Asked Questions
Can I make this huckleberry ice cream without an ice cream maker?
Yes, you can make this ice cream without a machine. Pour the combined base into a shallow freezer-safe container and stir vigorously every 30-45 minutes for several hours until frozen. This manual method requires patience to minimize ice crystals.
What if I can’t find fresh huckleberries?
Frozen huckleberries work exceptionally well in this recipe. If using frozen, pour them directly from the freezer into the saucepan. You may need to add a tablespoon or two of extra water, as they can release less liquid initially.
Why is my homemade ice cream icy?
Icy ice cream is usually a result of insufficient fat content or improper freezing. Ensure you use heavy cream and whole milk, and that your ice cream maker bowl is completely frozen and the base is very cold before churning.
How far in advance should I make the ice cream?
The ice cream base can be made and chilled up to 48 hours in advance. Churning is best done closer to serving time, ideally within 24 hours of churning for the best texture, as it hardens significantly in the freezer.
Can I use alternative sweeteners for this recipe?
Certainly, alternative sweeteners like maple syrup or agave can be used. However, the final texture and flavor profile will change slightly, and you may need to adjust the quantity based on their sweetness and liquid content.
Crafting homemade huckleberry ice cream is a rewarding culinary adventure. This straightforward recipe ensures you capture the unique, delightful taste of huckleberries in a creamy, satisfying dessert. Embrace the simplicity and enjoy the vibrant flavors that only true homemade ice cream can provide. It’s a taste of wild summer in every spoonful.
Print
Homemade Huckleberry Ice Cream Recipe
- Total Time: 50
- Yield: 6-8 servings
- Diet: Vegetarian
Description
A vibrant, fruit-forward ice cream made with fresh huckleberries, offering a rich and creamy texture with bursts of tart-sweet flavor. A simple, no-churn method for homemade frozen dessert.
Ingredients
2 cups fresh or frozen huckleberries
3/4 cup granulated sugar
2 tablespoons water
1 cup whole milk
2 cups heavy cream
1 teaspoon vanilla extract
Instructions
Combine huckleberries, sugar, and water in a saucepan. Gently heat over medium until berries soften and burst, about 5-7 minutes
Blend mixture until smooth, then strain through a fine mesh sieve to remove seeds
Chill mixture for at least 30 minutes
Purify milk, heavy cream, and vanilla extract in a separate bowl
Churn custard base in an ice cream machine according to manufacturer instructions
Once churned, gently stir in huckleberry puree
Freeze until firm (4-6 hours)
Notes
Use frozen huckleberries without thawing for better nutrients
Adjust sugar based on berries’ tartness
Add vanilla bean in whole for intensified flavor
Substitute huckleberries with wild blueberries or raspberries if unavailable
Store in airtight container with plastic wrap directly touching surface to prevent ice crystals
- Prep Time: 20
- Cook Time: 10
- Category: Trend Recipes
- Method: Churning
- Cuisine: American