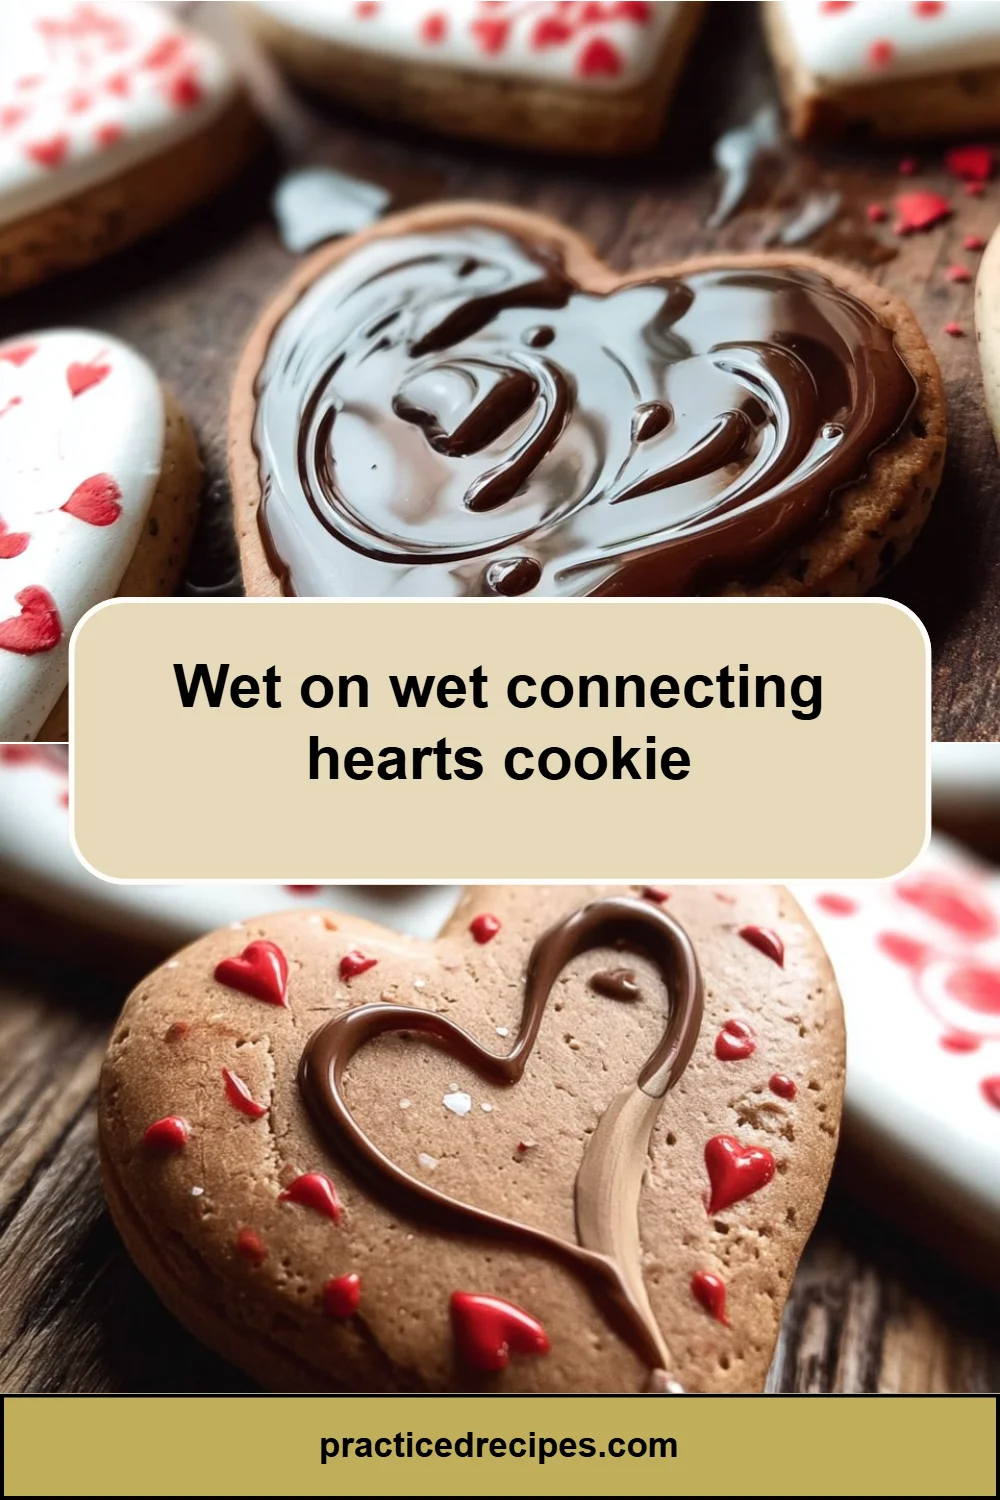
Wet on Wet Connecting Hearts Cookie
If you’re looking to impress with a fun and visually striking treat, the wet on wet connecting hearts cookie is the perfect choice. Its unique design not only dazzles the eye but also makes for a delightful baking project that can be enjoyed for various occasions.
Why Make This Recipe
Creating these connecting hearts cookies is more than just baking; it’s a chance to express creativity and love through food. Whether you’re planning for Valentine’s Day, a wedding celebration, or simply want to brighten someone’s day, these cookies serve as a heartfelt gesture. The gorgeous colors and patterns are sure to bring smiles, making them perfect for gifting or sharing among friends and family. Plus, they involve simple techniques that can be applied to future baking projects.
How to Make Wet on Wet Connecting Hearts Cookie
Creating these cookies is a breeze. With just a few steps, you can have a batch of beautifully decorated hearts ready to showcase your artistic skills.
Ingredients:
- 2 3/4 cups all-purpose flour
- 1 teaspoon baking powder
- 1/2 teaspoon salt
- 1 cup unsalted butter, softened
- 1 1/2 cups granulated sugar
- 1 large egg
- 2 teaspoons vanilla extract
- Royal icing in various colors (for decorating)
- Food coloring (optional, for icing colors)
Directions:
Prep the Dough
In a bowl, whisk together flour, baking powder, and salt. In another large bowl, beat the softened butter and granulated sugar until light and fluffy. Add the egg and vanilla extract, mixing until well combined.Combine Ingredients
Gradually add the dry ingredients to the wet mixture, mixing until a dough forms. Divide the dough into two equal portions, flatten them into discs, wrap in plastic wrap, and refrigerate for at least an hour.Roll and Cut the Cookies
Once chilled, preheat your oven to 350°F (175°C). Roll out one disc of dough on a lightly floured surface to about 1/4 inch thick. Use heart-shaped cookie cutters to cut out cookies, and place them on a parchment-lined baking sheet.Bake the Cookies
Bake the cookies for 8-10 minutes or until the edges are just starting to brown. Remove from the oven and allow them to cool completely on a wire rack.Prepare the Royal Icing
While the cookies cool, prepare the royal icing. Divide the icing into bowls and add food coloring to create your desired shades for decorating.Wet on Wet Technique
Once the cookies are cool, pipe a border around the outline of the hearts with one color of icing. Quickly fill the center with a different color, allowing the icing to spread and blend. Use a toothpick to create marbled designs or connect different colors.Let It Dry
Allow the decorated cookies to dry completely before storing or serving, which may take several hours or overnight.

Pro Tips for Success Wet on Wet Connecting Hearts Cookie
- Keep Icing Consistency in Mind: Your royal icing should be neither too runny nor too thick. Aim for a consistency that will hold its shape but is still pliable enough to spread.
- Use Piping Bags: Using piping bags makes it easier to control the flow of icing, especially for intricate designs.
- Work in Layers: Allow each layer of icing to dry slightly before adding more to achieve depth and interesting patterns without the colors bleeding into each other.
- Practice Makes Perfect: If you’re not satisfied with your first few cookies, don’t worry! Keep practicing the wet on wet technique to improve your design skills.
- Consider Temperature and Humidity: Decorate cookies in a cooler environment if possible, as heat and humidity can affect the drying time of icing.
- Have Fun with Colors: Experiment with various color combinations to find the ones that resonate with you and the occasion.
Flavor Variations Wet on Wet Connecting Hearts Cookie
- Chocolate Cookies: Substitute 1/2 cup of the flour with cocoa powder for a deliciously rich chocolate version.
- Lemon Zest: Add lemon zest to the dough for a refreshing citrus flavor that pairs well with sweet icing.
- Almond Essence: Instead of vanilla extract, use almond extract for a nutty twist.
- Spiced Hearts: Incorporate spices like cinnamon or nutmeg into the dough for a warm and fragrant cookie.
- Color Theme: Use different color palettes based on seasons (pastels for spring, dark tones for fall) to customize the look of your hearts.
Serving Suggestions Wet on Wet Connecting Hearts Cookie
These charming cookies are perfect for various occasions. Serve them at birthday parties, wedding showers, or as a centerpiece for your Valentine’s Day celebrations. They also make fantastic favors when packaged in clear bags with ribbons, making them a heartfelt gift. Place them on a decorative platter with other themed treats or alongside warm beverages for a cozy afternoon tea.
Storage and Freezing Instructions Wet on Wet Connecting Hearts Cookie
To keep your cookies fresh, store them in an airtight container at room temperature for up to one week. If you wish to prepare them in advance, you can freeze the undecorated cookies. Lay them flat in a single layer in a freezer-safe container, separating layers with parchment paper. When you’re ready to enjoy, simply thaw at room temperature and decorate as desired.
Nutrition Facts (Per Serving)
| Nutrient | Amount per Serving |
|—————|———————|
| Calories | 150 |
| Protein | 2g |
| Carbohydrates | 20g |
| Fat | 7g |
| Fiber | 0g |
| Sodium | 55mg |
FAQ About Wet on Wet Connecting Hearts Cookie
What is the wet on wet technique?
The wet on wet technique refers to a method of decorating with royal icing where wet icing is applied over a previously piped layer of wet icing. This allows for beautiful marbling or blending of colors, creating intricate designs that are visually appealing.
How do I know when my royal icing is ready?
Royal icing should have a consistency similar to honey. You can check this by lifting the whisk or piping bag; the icing should flow smoothly but hold its shape. It should not be too runny or too thick—test it on a plate to ensure it can spread without losing its outline.
Can I use other types of icing instead?
While royal icing is recommended for its smooth finish and hold, you could use other icings such as buttercream. However, the wet on wet technique is more challenging with softer icings, as they may not hold the same designs as well as royal icing.
How long does it take for the cookies to dry completely?
The drying time can vary based on the thickness of your icing and the humidity in your environment. In general, it can take at least 4 to 6 hours for the cookies to dry completely, or even longer if you’re in a humid area. For best results, leave them to dry overnight.
Can I use store-bought cookie dough for this recipe?
Yes, you can use store-bought cookie dough if you’re short on time. Just be sure to follow the directions for baking and allow the cookies to cool completely before decorating with royal icing.
What occasions are these cookies ideal for?
These connecting hearts cookies are perfect for various celebrations, including Valentine’s Day, anniversaries, bridal showers, and even just as a sweet treat for friends or family. The customizable design makes them great for any occasion where love and creativity are involved.
Final Thoughts
The wet on wet connecting hearts cookie not only serves as a delightful treat but also as a canvas for your creativity. Its vibrant colors and intricate designs can capture the essence of love and appreciation, making it a beloved recipe among bakers of all skill levels. By following the simple directions and embracing your artistic flair, you can create beautiful cookies that will touch hearts and create lasting memories. Whether you’re baking for a special occasion or just because, these cookies are sure to bring joy and smiles all around.
Print
Wet on Wet Connecting Hearts Cookie
- Total Time: 70 minutes
- Yield: 24 cookies
- Diet: Vegetarian
Description
A visually striking treat perfect for expressing creativity and love through food, ideal for special occasions like Valentine’s Day and weddings.
Ingredients
- 2 3/4 cups all-purpose flour
- 1 teaspoon baking powder
- 1/2 teaspoon salt
- 1 cup unsalted butter, softened
- 1 1/2 cups granulated sugar
- 1 large egg
- 2 teaspoons vanilla extract
- Royal icing in various colors (for decorating)
- Food coloring (optional, for icing colors)
Instructions
- In a bowl, whisk together flour, baking powder, and salt.
- In another large bowl, beat the softened butter and granulated sugar until light and fluffy. Add the egg and vanilla extract, mixing until well combined.
- Gradually add the dry ingredients to the wet mixture, mixing until a dough forms. Divide the dough into two equal portions, flatten them into discs, wrap in plastic wrap, and refrigerate for at least an hour.
- Once chilled, preheat your oven to 350°F (175°C). Roll out one disc of dough on a lightly floured surface to about 1/4 inch thick. Use heart-shaped cookie cutters to cut out cookies, and place them on a parchment-lined baking sheet.
- Bake the cookies for 8-10 minutes or until the edges are just starting to brown. Remove from the oven and allow them to cool completely on a wire rack.
- While the cookies cool, prepare the royal icing. Divide the icing into bowls and add food coloring to create your desired shades for decorating.
- Once the cookies are cool, pipe a border around the outline of the hearts with one color of icing. Quickly fill the center with a different color, allowing the icing to spread and blend. Use a toothpick to create marbled designs or connect different colors.
- Allow the decorated cookies to dry completely before storing or serving, which may take several hours or overnight.
Notes
Keep icing consistency in mind while decorating. Use piping bags for better control.
- Prep Time: 60 minutes
- Cook Time: 10 minutes
- Category: Dessert
- Method: Baking
- Cuisine: American