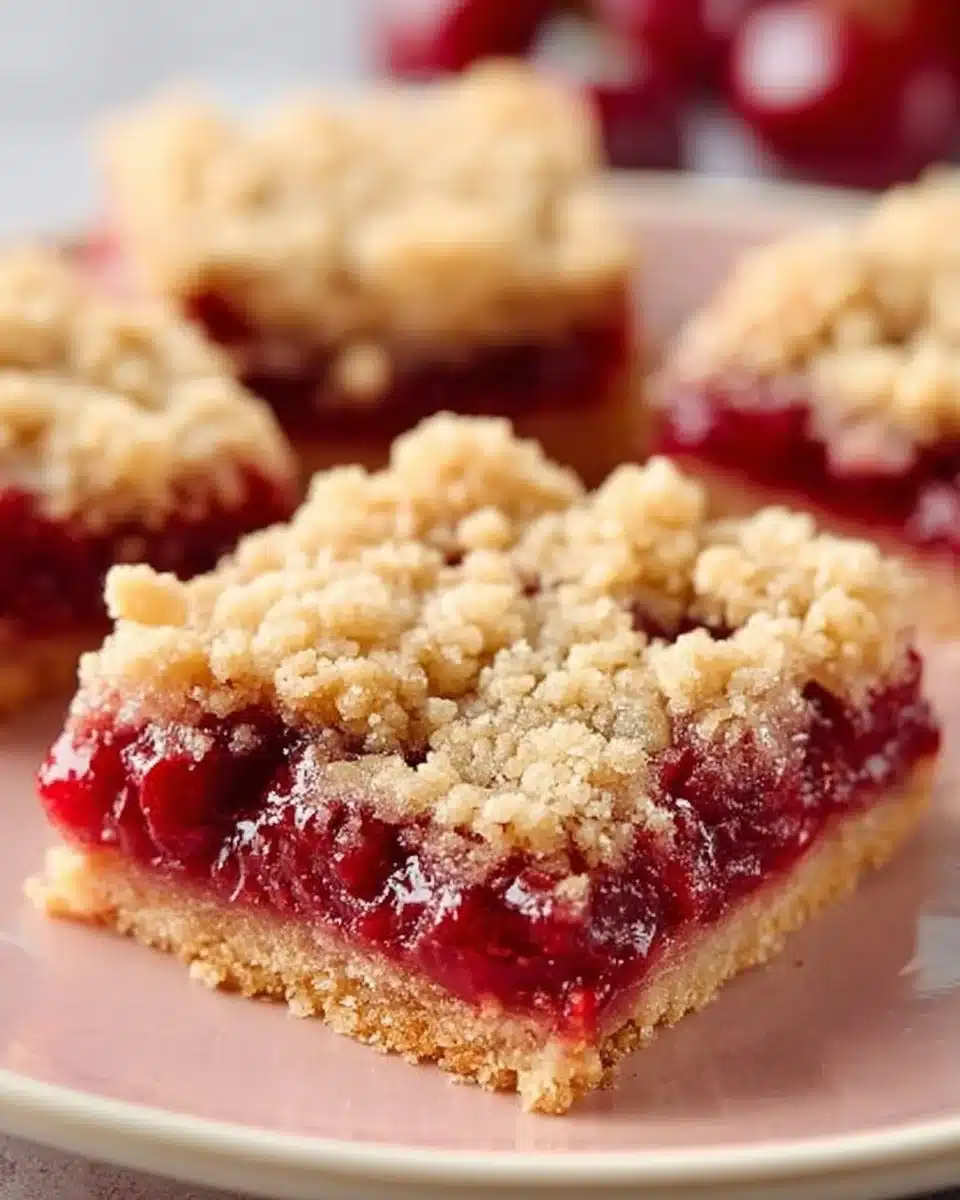
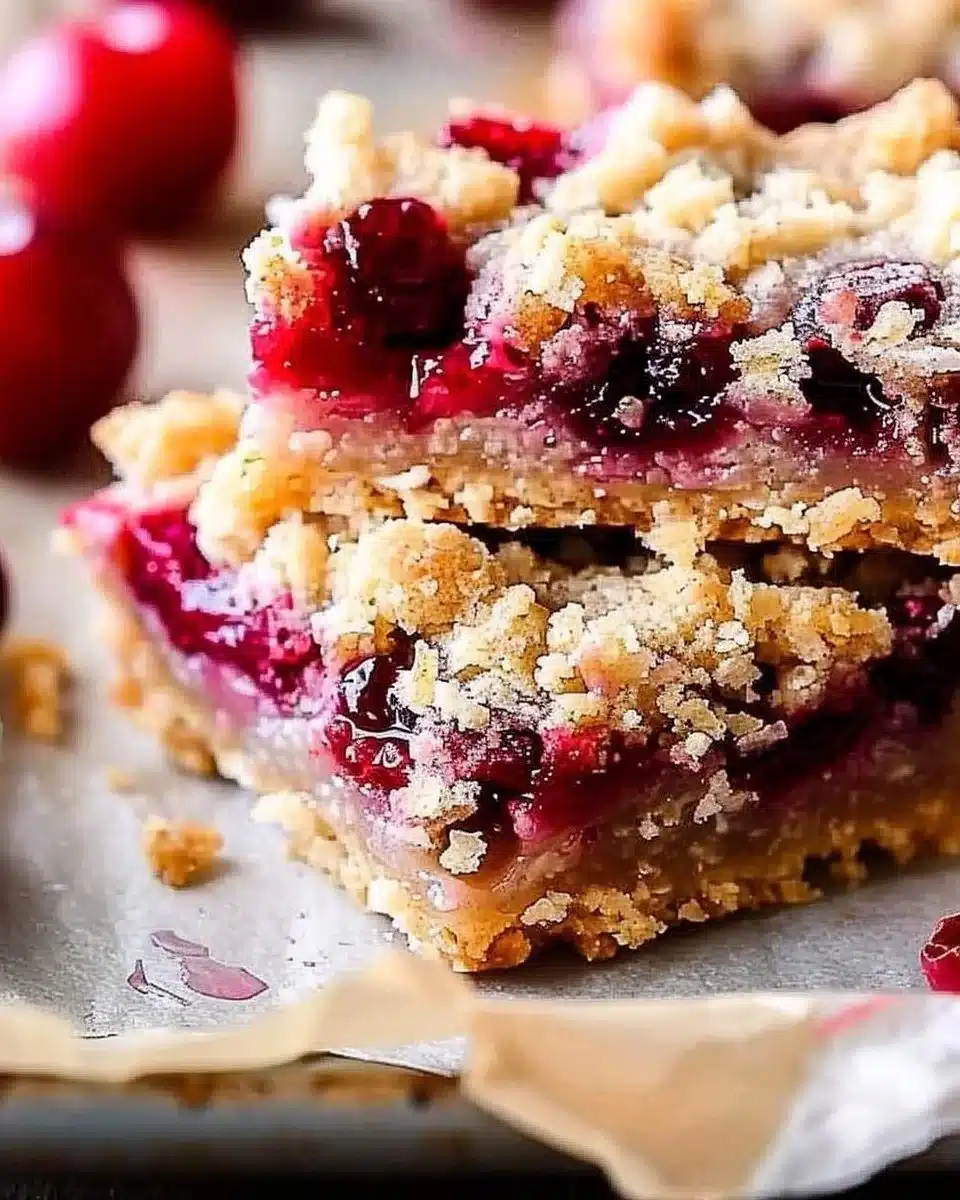
Easy & Tasty Cherry Crumble Bars are a simple, crowd-pleasing dessert that balances bright fruit filling with a buttery, oat-studded crumble — perfect for potlucks, packed lunches, or a cozy weeknight treat. Their sweet-tart cherry filling and crisp, crumbly topping make them a reliable favorite, and they’re easy enough that even beginner bakers can get great results. If you’re pairing desserts with dinners, they’re a lovely finish to casual meals and go particularly well after something homey and satisfying like deliciously easy chicken recipes.
Easy to scale, forgiving of small ingredient swaps, and quick to pull together, these bars let the natural flavor of cherries shine. Below you’ll find why they’re worth making, how to assemble them step by step, tips to succeed, tasty variations, serving ideas, storage guidance, approximate nutrition, and answers to common questions. Whether you have fresh summer cherries or frozen ones from the freezer, this recipe will deliver a dependable, comforting dessert.
Why make Easy & Tasty Cherry Crumble Bars
These cherry crumble bars hit a sweet spot: they’re simple to prepare, portable, and loved by adults and kids alike. Here’s why you might reach for this recipe again and again.
- Fast prep, big payoff. The dough and topping are mixed in one bowl and require no chilling, so assembly is quick. Baking time is modest and fills the kitchen with a warming, fruity aroma.
- Crowd-friendly format. Bars travel easily, stack neatly in a box, and cut into uniform portions for gatherings or school lunches.
- Seasonal flexibility. Use fresh summer cherries for a bright, juicy filling or frozen pitted cherries in off seasons for the same great flavor with less fuss.
- Texture contrast. The tender, slightly chewy crust and coarse oat crumble pair beautifully with a glossy, saucy cherry layer — a dessert that’s as fun to bite into as it is to make.
- Beginner-friendly technique. No fancy equipment, no intricate laminating or tempering — just basic mixing and a baking dish.
These bars are ideal when you want something homemade without a long list of steps. They’re forgiving enough that small swaps work, so if you’re trying to use pantry staples, this recipe won’t punish you.
How to make Easy & Tasty Cherry Crumble Bars
This method keeps things straightforward: prepare the cherry filling, make a single crumble mixture, press half into the pan for the crust, add filling, and top with the remaining crumble. Follow the Directions section below for exact steps.
Ingredients
- 2 cups fresh or frozen cherries, pitted
- 1 cup granulated sugar
- 1 tablespoon cornstarch
- 1 teaspoon vanilla extract
- 2 cups all-purpose flour
- 1 cup rolled oats
- 1/2 cup brown sugar
- 1/2 cup unsalted butter, melted
- 1/2 teaspoon salt
- 1/2 teaspoon cinnamon
Ingredient notes and substitutions:
- Cherries: Use pitted fresh cherries in season, or frozen pitted cherries (thawed slightly) any time of year. If you only have cherries with pits, a cherry pitter, small knife, or careful halving will work. You can also use a mixed berry blend (strawberries, raspberries, blueberries) if desired.
- Sugars: The blend of granulated and brown sugar gives balance: granulated sweetens the filling, while brown sugar adds depth to the crumble. For a less sweet filling, reduce the granulated sugar by 1/4 cup.
- Oats: Rolled oats create a pleasant chew and rustic texture. If all you have are quick oats, the texture will be softer but still good.
- Butter: Unsalted butter keeps sodium predictable. If you only have salted butter, omit or reduce the added salt in the recipe.
- Cornstarch: Thickens the cherry juices for a stable filling. Arrowroot is a one-to-one substitute if you prefer.
Directions
- Preheat the oven to 350°F (175°C). Grease a 9×9-inch baking dish.
- In a medium bowl, combine the cherries, granulated sugar, cornstarch, and vanilla extract. Set aside.
- In another large bowl, mix the flour, oats, brown sugar, melted butter, salt, and cinnamon until crumbly.
- Press half of the crumble mixture into the bottom of the prepared baking dish.
- Pour the cherry mixture over the crust, spreading it evenly.
- Sprinkle the remaining crumble mixture over the top of the cherries.
- Bake for 30–35 minutes, or until the top is golden brown.
- Allow to cool before cutting into bars. Serve and enjoy!
Pro Tips for Success Easy & Tasty Cherry Crumble Bars
- Even thickness matters: Press the bottom layer firmly and evenly to form a stable crust. Use the back of a measuring cup or your palms lined with parchment to get a compact, uniform base.
- Prevent a soggy bottom: If you’re using frozen cherries, thaw and drain excess liquid before assembling to reduce runniness. Tossing cherries with the cornstarch right before assembly helps the filling set as it bakes.
- Watch the top color: Oven temperatures vary. If the crumble is browning too quickly but the cherries look undercooked, loosely tent foil over the pan halfway through baking.
- Cool fully for cleaner slices: The filling firms up as it cools. For neat, attractive bars, let the pan cool on a rack for at least 30–45 minutes, or chill briefly in the fridge before cutting.
- Cut with a sharp, warm knife: Run a sharp knife under hot water and dry it before slicing. Wipe between cuts to maintain clean edges.
- Make-ahead advantage: These bars are great made the day before serving because flavors meld and textures settle. Store airtight at room temperature or refrigerate as noted below.
Flavor Variations Easy & Tasty Cherry Crumble Bars
- Almond-cherry: Add 1/2 teaspoon almond extract to the cherry filling and sprinkle 1/3 cup sliced almonds over the top crumble before baking for a nutty lift.
- Chocolate-studded: Fold 1/2 cup mini chocolate chips into the top crumble before baking. The heat will soften them slightly — a nice contrast to tart cherries.
- Citrus brightness: Add the zest of one lemon to the cherry filling and replace the vanilla with lemon extract to brighten the flavor profile.
- Mixed fruit crumble: Swap half the cherries for halved strawberries or blueberries for a more complex fruit filling. Adjust sugar slightly if using sweeter fruits.
- Spiced crumble: Increase cinnamon to 1 teaspoon and add 1/4 teaspoon ground ginger or cardamom for a warmly spiced crumb topping.
Serving Suggestions Easy & Tasty Cherry Crumble Bars
These bars are delicious served warm, room temperature, or chilled. Here are simple ways to turn them into a memorable dessert experience:
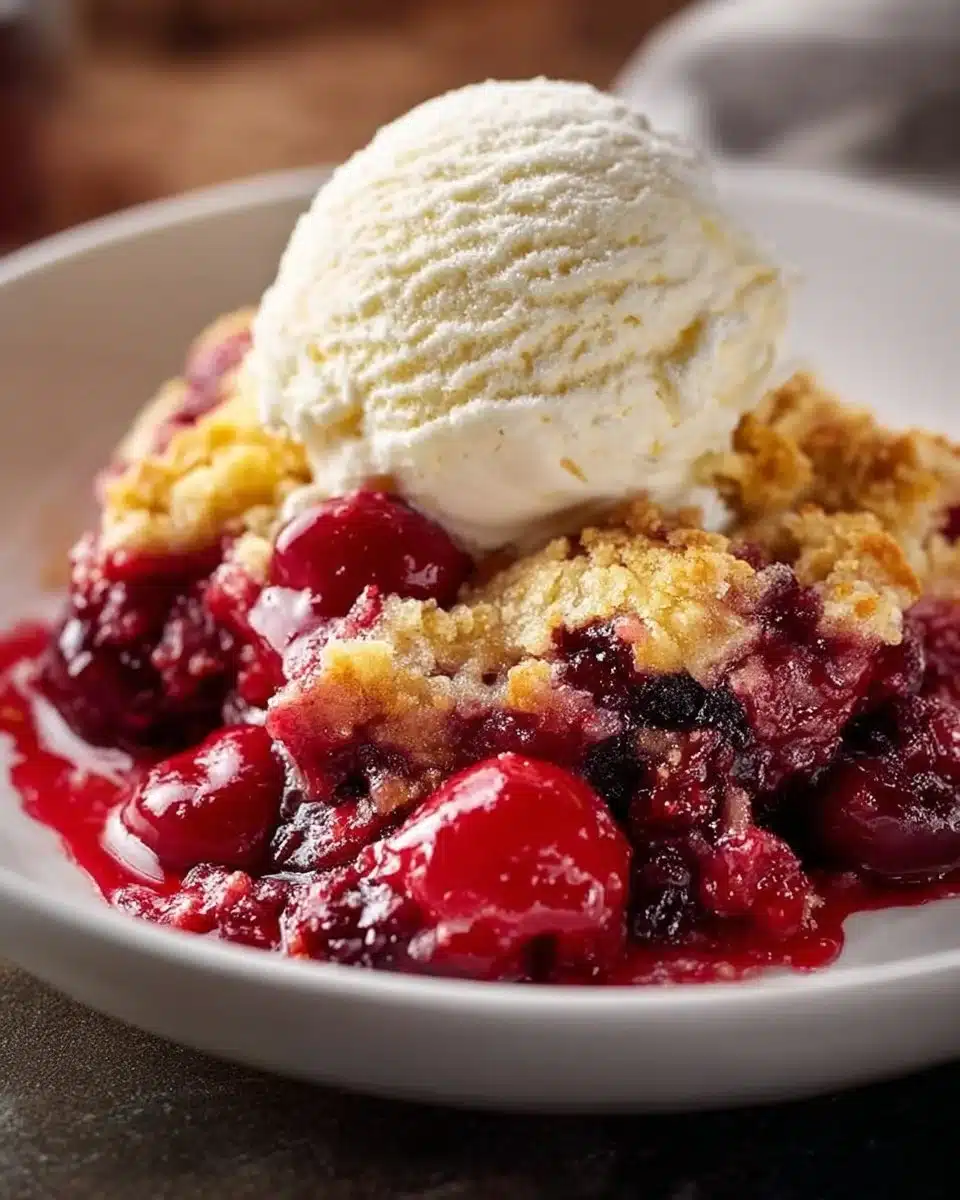
- Classic scoop: Serve a warm bar with a scoop of vanilla ice cream and a drizzle of extra cherry juices if you saved any. The melting ice cream contrasts beautifully with the crisp crumble.
- Morning treat: Pair a bar with a cup of coffee or tea for a sweet breakfast or mid-morning snack. They’re portable and reheatable for a quick morning pick-me-up.
- Dessert board: Cut into smaller squares and add to a dessert board with cookies, sliced fresh fruit, and a small bowl of whipped cream or yogurt for dipping.
- After comfort meals: These bars complement hearty weeknight mains. For easy meal planning, they’re perfect alongside simple slow-cooked entrees — try pairing with easy slow cooker dinner ideas when you want dinner and dessert that practically make themselves.
- Elegant finish: Warm a slice and dust lightly with powdered sugar, add a few fresh mint leaves, and serve as a slightly more refined dessert for guests.
Storage and Freezing Instructions Easy & Tasty Cherry Crumble Bars
Storing:
- Room temperature: Once completely cooled, cover the pan tightly with plastic wrap or transfer bars to an airtight container. They’ll keep well at room temperature for up to 2 days.
- Refrigeration: For longer freshness, store bars in an airtight container in the refrigerator for up to 5 days. Chilling helps the filling set firmly and makes slicing cleaner.
- Reheating: Warm individual bars in the microwave for 10–20 seconds or in a preheated 300°F (150°C) oven for 8–10 minutes to refresh the crisp topping.
Freezing:
- Freeze whole pan: Wrap the cooled pan tightly with two layers of plastic wrap and a layer of foil. Freeze for up to 3 months. Thaw in the refrigerator overnight, then warm gently before serving.
- Freeze individual bars: Place fully cooled, sliced bars on a baking sheet in a single layer and freeze until firm (about 1–2 hours). Transfer to a freezer-safe bag or container with parchment between layers. Freeze up to 3 months. Thaw at room temperature or warm in a low oven.
Tips for best texture after freezing:
- Slightly underbake by 2–3 minutes if you plan to freeze, so reheated bars won’t over-brown.
- Reheat from thawed for best texture; if reheating frozen bars directly, use low oven heat to warm through without burning the top.
Nutrition Facts (Per Serving — assuming 16 servings)
- Calories: 215 kcal
- Protein: 2.5 g
- Carbohydrates: 37 g
- Fat: 6.3 g
- Fiber: 1.3 g
- Sodium: 75 mg
Nutrition notes:
- These values are estimates based on standard ingredient weights and a yield of 16 bars from a 9×9-inch pan. Exact nutrition will vary by brands and whether you use fresh or frozen cherries, the exact size of your servings, and substitutions such as reduced sugar or different fats.
- If you’re lowering sugar, reduce the granulated sugar in the filling by up to 1/4 cup and substitute a touch of maple syrup or honey in the crumble as needed for moisture (note: this will slightly change texture and calories).
FAQ About Easy & Tasty Cherry Crumble Bars
How do I prevent a runny cherry filling?
A runny filling is most often caused by excess liquid from frozen cherries or not enough thickener. Toss cherries (especially thawed frozen ones) with the cornstarch and sugar right before assembling; cornstarch needs the moisture from the cherries to gelatinize and thicken during baking. If you expect very juicy fruit, increase cornstarch to 1.5 tablespoons. Also make sure you don’t overfill the pan — a thinner layer of cherries will set firmer.
Can I use frozen cherries without thawing them first?
You can use frozen cherries straight from the freezer, but they’ll release extra water while baking and may lengthen baking time slightly. If using frozen cherries, consider thawing them partially and draining excess liquid, then tossing them with the sugar and cornstarch. This approach reduces runniness and helps the filling set more predictably.
How should I cut neat bars without crumbling?
Let the pan cool sufficiently — the filling firms as it cools, which reduces smearing when sliced. For the cleanest cuts, chill the whole pan for 30–60 minutes in the refrigerator. Use a sharp chef’s knife warmed under hot water and wiped dry between cuts. Pressing the knife straight down rather than sawing keeps the crumb topping intact.
Can I make these gluten-free or vegan?
Yes. For gluten-free bars, use a 1:1 gluten-free all-purpose flour blend and certified gluten-free oats. For vegan bars, replace the butter with a plant-based butter or coconut oil and use brown sugar that’s certified vegan if needed. Keep in mind texture and flavor will vary slightly — coconut oil can make the topping crisper and a touch more coconut-flavored.
What pan size is best — can I scale the recipe?
A 9×9-inch baking dish is ideal for the proportions given and typically yields 16 bars. To make a larger batch, use a 9×13-inch pan and increase ingredients by 1.5 to 2 times depending on how thick you want the layers. If scaling up, watch bake time; a larger dish may require a slightly longer bake and possibly tenting with foil if the top browns too quickly.
Is there a way to make these less sweet?
Yes. Reduce the granulated sugar in the filling by 1/4 cup to 1/3 cup to let the cherry’s natural tartness shine. You can also replace part of the granulated sugar with a less intense sweetener (like a liquid sweetener: honey or maple syrup) in the crumble, but remember liquid sweeteners change the moisture ratio and can slightly alter texture. Taste the filling before assembling and adjust as needed.
Final Thoughts
Easy & Tasty Cherry Crumble Bars are a reliable, comforting dessert that balances fruit brightness with a buttery, oat-filled crumble. They’re simple to make, versatile for substitutions, and well-suited to many occasions — from school lunches to weekend gatherings. With basic pantry ingredients and a few helpful tips, you can bake a pan of these bars that looks and tastes like a treat from a bakery without the fuss. Try them warm with vanilla ice cream, make a batch for a potluck, or keep them on hand for a quick sweet bite — they’re a small effort for a big reward.
Print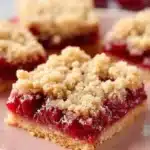
Easy & Tasty Cherry Crumble Bars
- Total Time: 45 minutes
- Yield: 16 servings
- Diet: Vegetarian
Description
Simple, crowd-pleasing dessert with a bright cherry filling and a buttery, oat-studded crumble.
Ingredients
- 2 cups fresh or frozen cherries, pitted
- 1 cup granulated sugar
- 1 tablespoon cornstarch
- 1 teaspoon vanilla extract
- 2 cups all-purpose flour
- 1 cup rolled oats
- 1/2 cup brown sugar
- 1/2 cup unsalted butter, melted
- 1/2 teaspoon salt
- 1/2 teaspoon cinnamon
Instructions
- Preheat the oven to 350°F (175°C). Grease a 9×9-inch baking dish.
- Combine the cherries, granulated sugar, cornstarch, and vanilla extract in a medium bowl. Set aside.
- Mix the flour, oats, brown sugar, melted butter, salt, and cinnamon in another large bowl until crumbly.
- Press half of the crumble mixture into the bottom of the prepared baking dish.
- Pour the cherry mixture over the crust, spreading it evenly.
- Sprinkle the remaining crumble mixture over the top of the cherries.
- Bake for 30–35 minutes, or until the top is golden brown.
- Allow to cool before cutting into bars. Serve and enjoy!
Notes
Press the bottom layer firmly for a stable crust and ensure frozen cherries are thawed and drained to prevent a soggy bottom.
- Prep Time: 15 minutes
- Cook Time: 30 minutes
- Category: Dessert
- Method: Baking
- Cuisine: American